First-Time Flyer's Guide to South Florida Airports
Airport Transportation · 7 min read
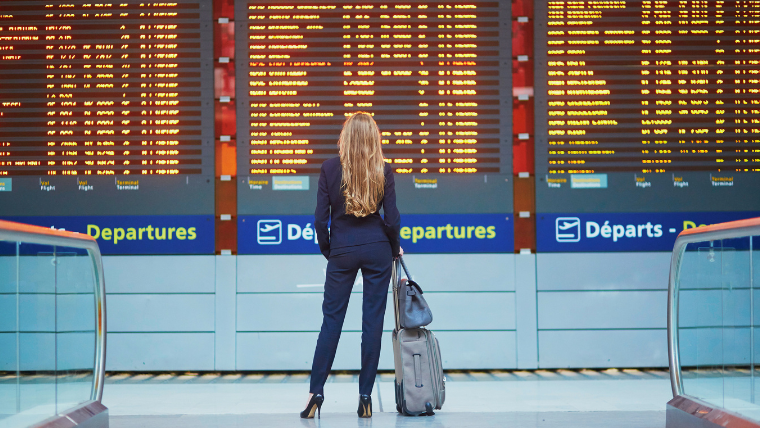
Flying for the first time can feel overwhelming — navigating unfamiliar terminals, figuring out security procedures, and managing pre-flight nerves all at once. If you’re preparing for your first flight through Fort Lauderdale-Hollywood International Airport (FLL), Miami International Airport (MIA), or Palm Beach International Airport (PBI), you’re in the right place.
This guide walks you through exactly what to expect at South Florida airports, from check-in to boarding. We’ll cover how early to arrive, what happens at security, smart packing tips, and proven strategies to calm first-flight anxiety. By the time you finish reading, you’ll feel confident and ready for takeoff.
And here’s a tip from the start: the easiest way to reduce travel stress is eliminating ground transportation worries entirely. When a professional chauffeur handles your airport transportation, you arrive relaxed, on time, and ready to focus on your flight — not parking, navigation, or traffic.
How Early Should You Arrive at the Airport?
The golden rule for first-time flyers: arrive earlier than you think you need to. For domestic flights departing from FLL, MIA, or PBI, plan to be at the airport at least two hours before your scheduled departure. For international flights, extend that to three hours.
Why the extra buffer? South Florida airports see heavy traffic year-round, and peak travel periods — especially during the winter snowbird season from November through April — can push security lines longer than usual. MIA in particular handles over 50 million passengers annually and serves as a major hub for international travel to Latin America and the Caribbean. First-time flyers navigating Concourse D alone (with its 60 gates) will appreciate the extra time.
FLL offers a more relaxed experience with shorter TSA lines, but don’t let that tempt you to cut it close. The time between parking your car, checking bags, clearing security, and walking to your gate adds up quickly — especially if anything unexpected happens along the way.
If you’re flying out of PBI, you’ll enjoy the most laid-back experience of the three airports. It’s smaller, quieter, and easier to navigate. Still, two hours remains the safe standard for domestic departures.
One way to reclaim some of that arrival buffer: skip the parking garage and rental car return lines entirely. A professional car service drops you curbside at your terminal, saving 15-20 minutes and eliminating the stress of finding a parking spot.
What to Expect at Airport Security
Understanding the TSA screening process ahead of time takes the mystery out of airport security. Here’s exactly what happens from the moment you enter the checkpoint — and how to move through efficiently.
1. Have Your ID and Boarding Pass Ready
Before you reach the TSA agent, pull out your government-issued photo ID (driver’s license or passport) and your boarding pass. The agent will verify both, then direct you to the screening line. Note: as of May 2025, REAL ID is required for domestic air travel. Check your license for the star symbol confirming compliance.
2. Remove Items from Your Pockets
Empty everything into your carry-on bag before reaching the bins — phone, wallet, keys, coins, tissues, even gum wrappers. Anything in your pockets will trigger the body scanner and require a pat-down.
3. Place Liquids in a Clear Quart-Sized Bag
All liquids, gels, aerosols, creams, and pastes in your carry-on must be in containers of 3.4 ounces or less, packed inside a single clear plastic bag. One bag per passenger. Pull this bag out and place it in a bin by itself.
4. Laptops and Large Electronics Go in Separate Bins
Remove your laptop, tablet, and any electronics larger than a cell phone from your bag. Each gets its own bin. Keep smaller items like phones and earbuds inside your carry-on.
5. Walk Through the Scanner and Collect Your Items
Follow the TSA officer’s instructions and step into the body scanner with your feet on the marked spots and arms raised. After you’re cleared, collect your belongings from the belt. Don’t rush — take a moment to put your shoes back on, gather your items, and step away from the checkpoint before reorganizing your bag.
First-time flyers often feel rushed at security, but there’s no need to panic. TSA agents process thousands of passengers daily and expect questions from new travelers. If you’re unsure about anything, simply ask.
Start Your Trip Stress-Free
One less thing to worry about — let a professional chauffeur handle your airport transportation so you can focus on your flight, not the drive.
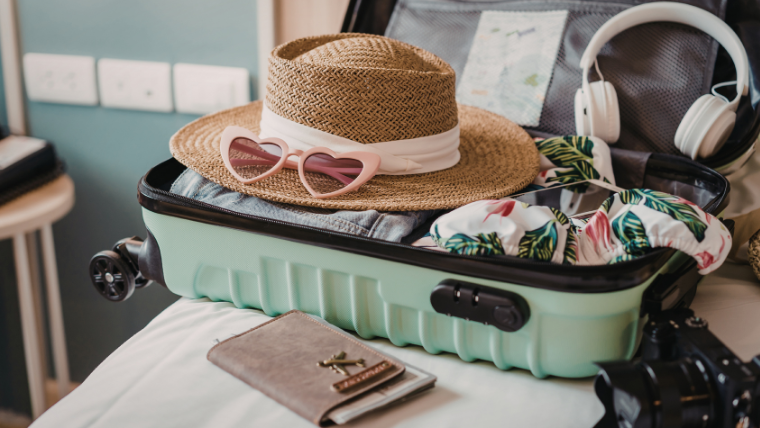
Packing Smart: Carry-On vs. Checked Bags
Knowing what to pack — and where to pack it — prevents headaches at security and ensures you have essentials within reach during your flight.
![]() Follow the 3-1-1 Rule for Liquids
Follow the 3-1-1 Rule for Liquids
All liquids in your carry-on must be 3.4 ounces or less, fit in one quart-sized clear bag, and be limited to one bag per person. Pack full-size toiletries in your checked luggage instead.
![]() Keep Essentials in Your Personal Item
Keep Essentials in Your Personal Item
Your personal item (purse, backpack, or small bag) goes under the seat in front of you. Pack items you’ll need during the flight: headphones, phone charger, snacks, medication, and your ID. This way you won’t need to access the overhead bin mid-flight.
![]() Wear Comfortable, Easy-to-Remove Shoes
Wear Comfortable, Easy-to-Remove Shoes
Slip-on shoes speed you through security. While domestic travelers no longer need to remove shoes at standard TSA checkpoints (as of July 2025), some situations still require it. Comfort matters on flights — skip the heels and tight dress shoes.
![]() Bring an Empty Water Bottle
Bring an Empty Water Bottle
You can’t bring liquids through security, but you can bring an empty reusable bottle and fill it at a water fountain or bottle-filling station after you clear the checkpoint. Staying hydrated on flights is essential — cabin air is extremely dry.
Tips for Managing First-Flight Anxiety
Feeling nervous before your first flight is completely normal. Millions of people fly safely every day, and with a few mental strategies, you can settle into your seat feeling calm and confident.
1. Educate Yourself About What You’ll Hear and Feel
Strange sounds and sensations are part of normal flight operations. The rumble during taxi is the engines; the “ding” is the seatbelt sign; the bump during takeoff is the landing gear retracting. When you expect these sounds, they’re no longer alarming.
2. Use Breathing Exercises
Deep, slow breathing activates your body’s relaxation response. Try the 4-7-8 technique: inhale through your nose for 4 seconds, hold for 7 seconds, exhale through your mouth for 8 seconds. Repeat until you feel calmer.
3. Distract Yourself with Entertainment
Download movies, podcasts, audiobooks, or music to your phone before your flight. Having something to focus on keeps your mind occupied and makes the flight feel shorter.
4. Avoid Caffeine and Alcohol
Both caffeine and alcohol can increase anxiety and dehydration. Stick to water or herbal tea before and during your flight. You’ll arrive at your destination feeling better.
5. Talk to the Flight Crew
Flight attendants are trained to help nervous passengers. Don’t hesitate to let them know it’s your first flight — they’ll check in on you and explain anything that seems concerning. You’re not alone.
One of the most effective ways to reduce travel anxiety is eliminating stressors before you even reach the airport. When you arrange professional airport transportation, you don’t worry about traffic, parking, or rushing through the terminal. You simply relax in a comfortable vehicle, arrive curbside at your terminal, and begin your journey already calm.
Frequently Asked Questions About Flying for the First Time
Here are answers to common questions first-time flyers ask about South Florida airports:
How early should I arrive at the airport for my first flight?
Plan to arrive at least two hours before domestic flights and three hours before international flights. South Florida airports like MIA and FLL can have long security lines, especially during peak travel seasons. Arriving early gives you time to check in, clear security, find your gate, and relax before boarding.
What documents do I need to fly domestically?
You need a valid government-issued photo ID such as a driver’s license or passport. As of May 2025, your ID must be REAL ID compliant for domestic air travel. Look for the star symbol in the upper corner of your license. If your ID is not compliant, you will need a passport or other approved identification.
Can I bring snacks and food through airport security?
Yes, solid foods are allowed through TSA security checkpoints. Sandwiches, chips, fruit, and granola bars are all fine. Liquids, spreads, and items with high liquid content like yogurt must follow the 3-1-1 rule. When in doubt, pack it in your checked bag or eat it before security.
What happens if I miss my flight?
Contact your airline immediately. Most airlines will rebook you on the next available flight, though fees may apply depending on your ticket type. This is why arriving early is so important — unexpected delays happen, and a time buffer protects you from missing your departure.
Is turbulence dangerous?
No, turbulence is not dangerous. It is a normal part of flying caused by air currents and weather patterns. Aircraft are designed to handle turbulence safely. If you experience rough air, keep your seatbelt fastened and try to stay calm. Flight attendants remain calm during turbulence because they know it is routine.
Book Your Airport Transportation Today
With over 30 years of experience serving South Florida, Larry’s Limo provides reliable, professional airport transportation to and from FLL, MIA, and PBI. Our licensed, background-checked chauffeurs arrive on time, handle your luggage, and deliver you curbside at your terminal — so you can focus on your journey, not the drive.
Start your trip the right way. Book your reservation today or call us directly.